Posted by tomek_rudzki
It’s rather common for companies to build their websites using modern JavaScript frameworks and libraries like React, Angular, or Vue. It’s obvious by now that the web has moved away from plain HTML and has entered the era of JS.
While there is nothing unusual with a business willing to take advantage of the latest technologies, we need to address the stark reality of this trend: Most of the migrations to JavaScript frameworks aren’t being planned with users or organic traffic in mind.
Let’s call it the JavaScript Paradox:
- The big brands jump on the JavaScript hype train after hearing all the buzz about JavaScript frameworks creating amazing UXs.
- Reality reveals that JavaScript frameworks are really complex.
- The big brands completely butcher the migrations to JavaScript. They lose organic traffic and often have to cut corners rather than creating this amazing UX journey for their users (I will mention some examples in this article).
Since there’s no turning back, SEOs need to learn how to deal with JavaScript websites.
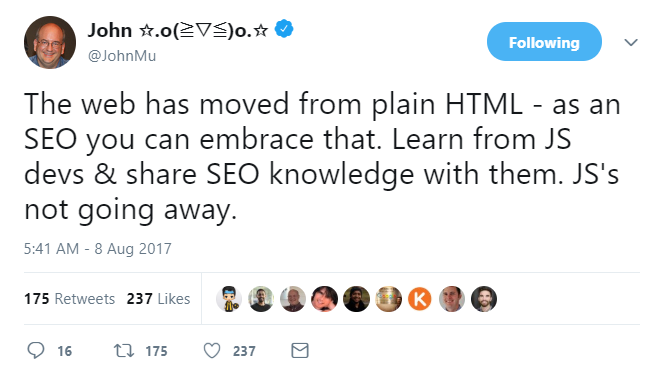
But that’s easier said than done because making JavaScript websites successful in search engines is a real challenge both for developers and SEOs.
This article is meant to be a follow-up to my comprehensive Ultimate Guide to JavaScript SEO, and it’s intended to be as easy to follow as possible. So, grab yourself a cup of coffee and let’s have some fun — here are six steps to help you diagnose and solve JavaScript SEO issues.
Step 1: Use the URL inspection tool to see if Google can render your content
The URL inspection tool (formerly Google Fetch and Render) is a great free tool that allows you to check if Google can properly render your pages.
The URL inspection tool requires you to have your website connected to Google Search Console. If you don’t have an account yet, check Google’s Help pages.
Open Google Search Console, then click on the URL inspection button.

In the URL form field, type the full URL of a page you want to audit.
Then click on TEST LIVE URL.
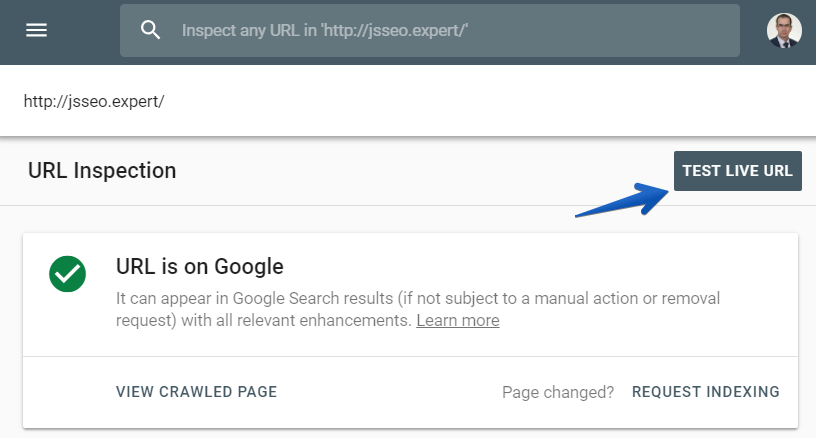
Once the test is done, click on VIEW TESTED PAGE.
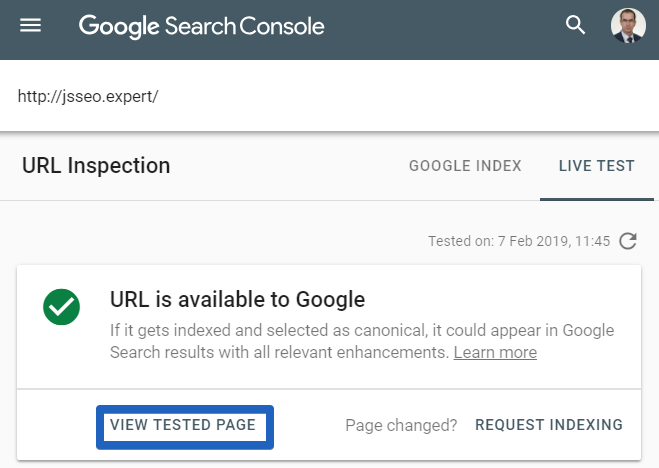
And finally, click on the Screenshot tab to view the rendered page.
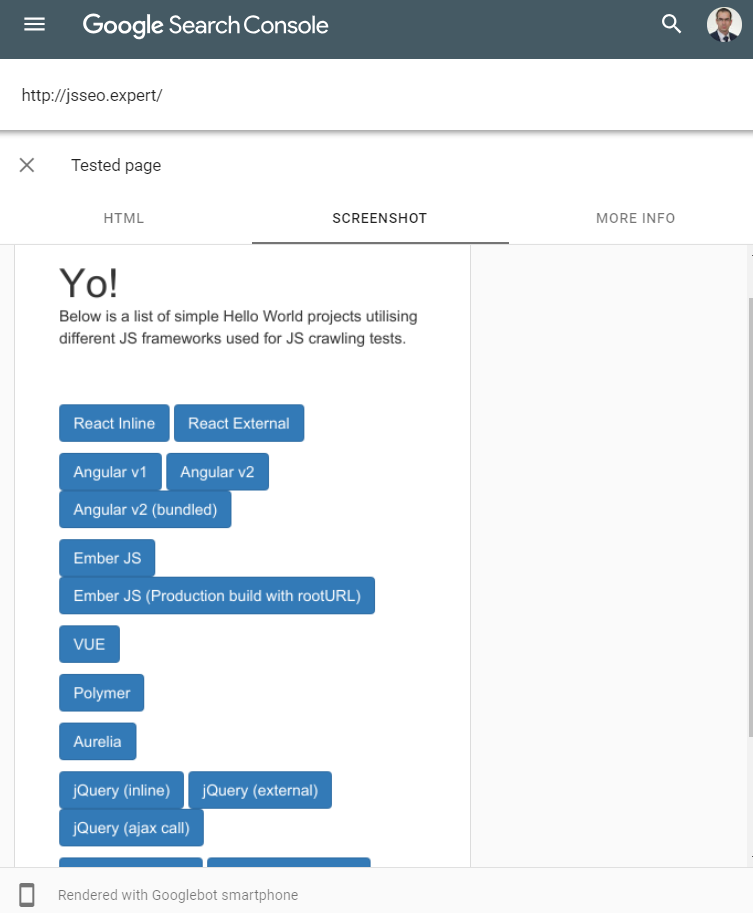
Scroll down the screenshot to make sure your web page is rendered properly. Ask yourself the following questions:
- Is the main content visible?
- Can Google see the user-generated comments?
- Can Google access areas like similar articles and products?
- Can Google see other crucial elements of your page?
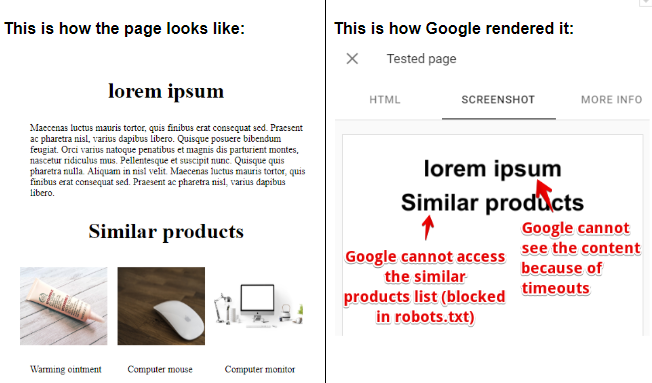
Why does the screenshot look different than what I see in my browser? Here are some possible reasons:
- Google encountered timeouts while rendering.
- Some errors occurred while rendering. You probably used some features that are not supported by Google Web Rendering Service (Google uses the four-year-old Chrome 41 for web rendering, which doesn’t support many modern features).
- You blocked crucial JavaScript files for Googlebot.
Step 2: Make sure you didn’t block JavaScript files by mistake
If Google cannot render your page properly, you should make sure you didn’t block important JavaScript files for Googlebot in robots.txt
TL;DR: What is robots.txt?
It’s a plain text file that instructs Googlebot or any other search engine bot if they are allowed to request a page/resource.
Fortunately, the URL Inspection tool points out all the resources of a rendered page that are blocked by robots.txt.
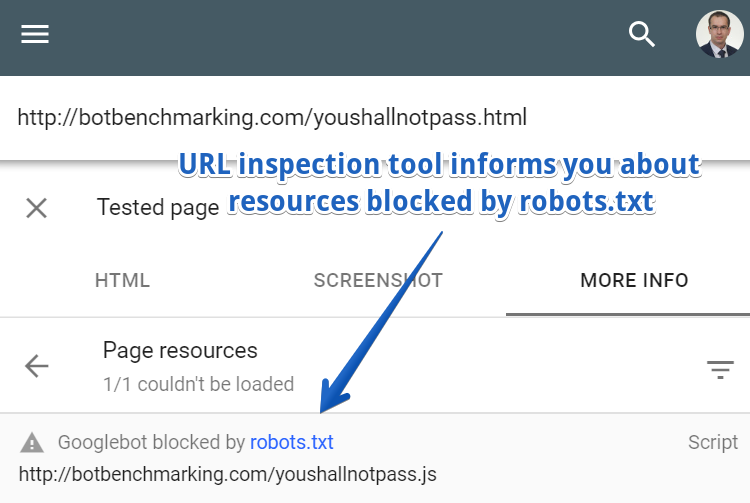
But how can you tell if a blocked resource is important from the rendering point of view?
You have two options: Basic and Advanced.
Basic
In most cases, it may be a good idea to simply ask your developers about it. They created your website, so they should know it well.
Obviously, if the name of a script is called content.js or productListing.js, it’s probably relevant and shouldn’t be blocked.
Unfortunately, as for now, URL Inspection doesn’t inform you about the severity of a blocked JS file. The previous Google Fetch and Render had such an option:
Advanced
Now, we can use Chrome Developer Tools for that.
For educational purposes, we will be checking the following URL: http://botbenchmarking.com/youshallnotpass.html
Open the page in the most recent version of Chrome and go to Chrome Developers Tools. Then move to the Network tab and refresh the page.
Finally, select the desired resource (in our case it’s YouShallNotPass.js), right-click, and choose Block request URL.
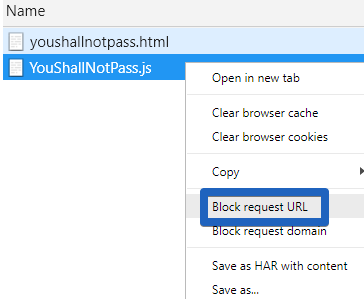
Refresh the page and see if any important content disappeared. If so, then you should think about deleting the corresponding rule from your robots.txt file.
Step 3: Use the URL Inspection tool for fixing JavaScript errors
If you see Google Fetch and Render isn’t rendering your page properly, it may be due to the JavaScript errors that occurred while rendering.
To diagnose it, in the URL Inspection tool click on the More info tab.
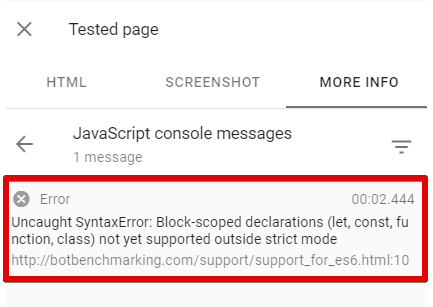
Then, show these errors to your developers to let them fix it.
Just ONE error in the JavaScript code can stop rendering for Google, which in turn makes your website not indexable.
Your website may work fine in most recent browsers, but if it crashes in older browsers (Google Web Rendering Service is based on Chrome 41), your Google rankings may drop.
Need some examples?
- A single error in the official Angular documentation caused Google to be unable to render our test Angular website.
- Once upon a time, Google deindexed some pages of Angular.io, an official website of Angular 2+.
If you want to know why it happened, read my Ultimate Guide to JavaScript SEO.
Side note: If for some reason you don’t want to use the URL Inspection tool for debugging JavaScript errors, you can use Chrome 41 instead.
Personally, I prefer using Chrome 41 for debugging purposes, because it’s more universal and offers more flexibility. However, the URL Inspection tool is more accurate in simulating the Google Web Rendering Service, which is why I recommend that for people who are new to JavaScript SEO.
Step 4: Check if your content has been indexed in Google
It’s not enough to just see if Google can render your website properly. You have to make sure Google has properly indexed your content. The best option for this is to use the site: command.
It’s a very simple and very powerful tool. Its syntax is pretty straightforward: site:[URL of a website] “[fragment to be searched]”. Just take caution that you didn’t put the space between site: and the URL.
Let’s assume you want to check if Google indexed the following text “Develop across all platforms” which is featured on the homepage of Angular.io.
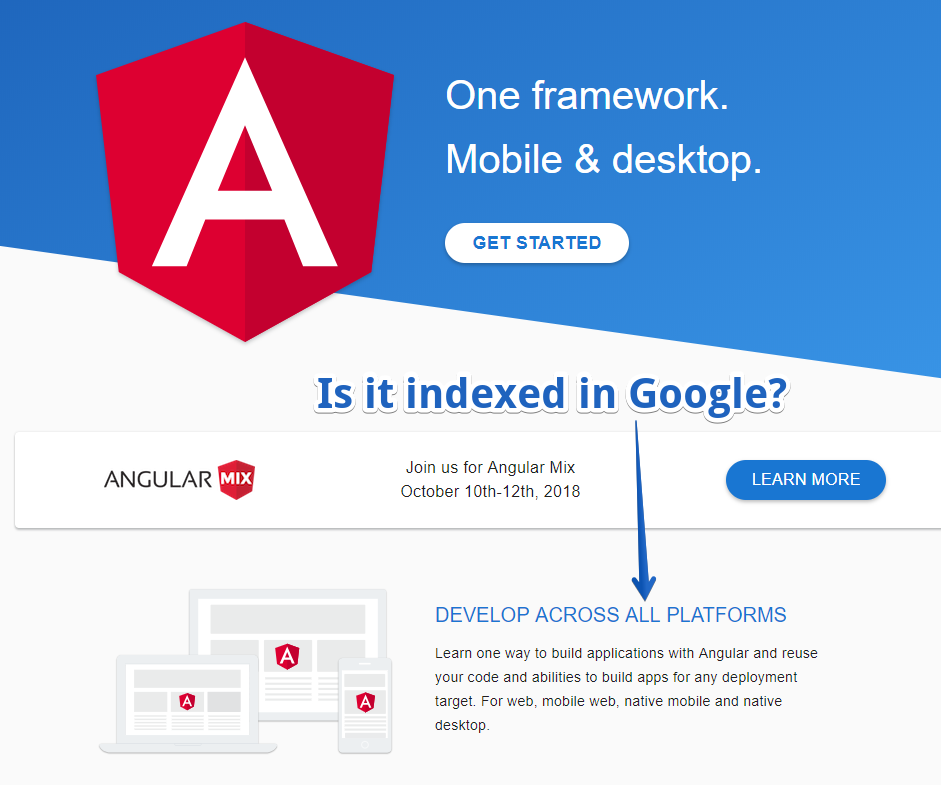
Type the following command in Google: site:angular.io “DEVELOP ACROSS ALL PLATFORMS”
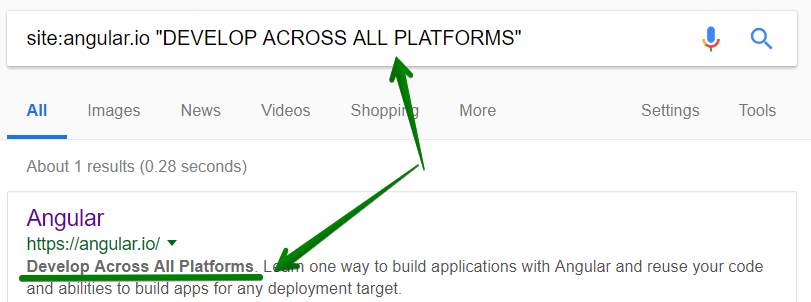
As you can see, Google indexed that content, which is what you want, but that’s not always the case.
Takeaway:
- Use the site: command whenever possible.
- Check different page templates to make sure your entire website works fine. Don’t stop at one page!
If you’re fine, go to the next step. If that’s not the case, there may be a couple of reasons why this is happening:
- Google still didn’t render your content. It should happen up to a few days/weeks after Google visited the URL. If the characteristics of your website require your content to be indexed as fast as possible, implement SSR.
- Google encountered timeouts while rendering a page. Are your scripts fast? Do they remain responsive when the server load is high?
- Google is still requesting old JS files. Well, Google tries to cache a lot to save their computing power. So, CSS and JS files may be cached aggressively. If you can see that you fixed all the JavaScript errors and Google still cannot render your website properly, it may be because Google uses old, cached JS and CSS files. To work around it, you can embed a version number in the filename, for example, name it bundle3424323.js. You can read more in Google Guides on HTTP Caching.
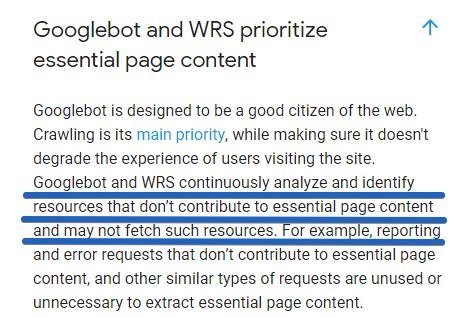
- While indexing, Google may not fetch some resources if it decides that they don’t contribute to the essential page content.
Step 5: Make sure Google can discover your internal links
There are a few simple rules you should follow:
- Google needs proper links to discover the URLs on your website.
- If your links are added to the DOM only when somebody clicks on a button, Google won’t see it.
As simple as that is, plenty of big companies make these mistakes.
Proper link structure
Googlebot, in order to crawl a website, needs to have traditional “href” links. If it’s not provided, many of your webpages will simply be unreachable for Googlebot!
I think it was explained well by Tom Greenway (a Google representative) during the Google I/O conference:
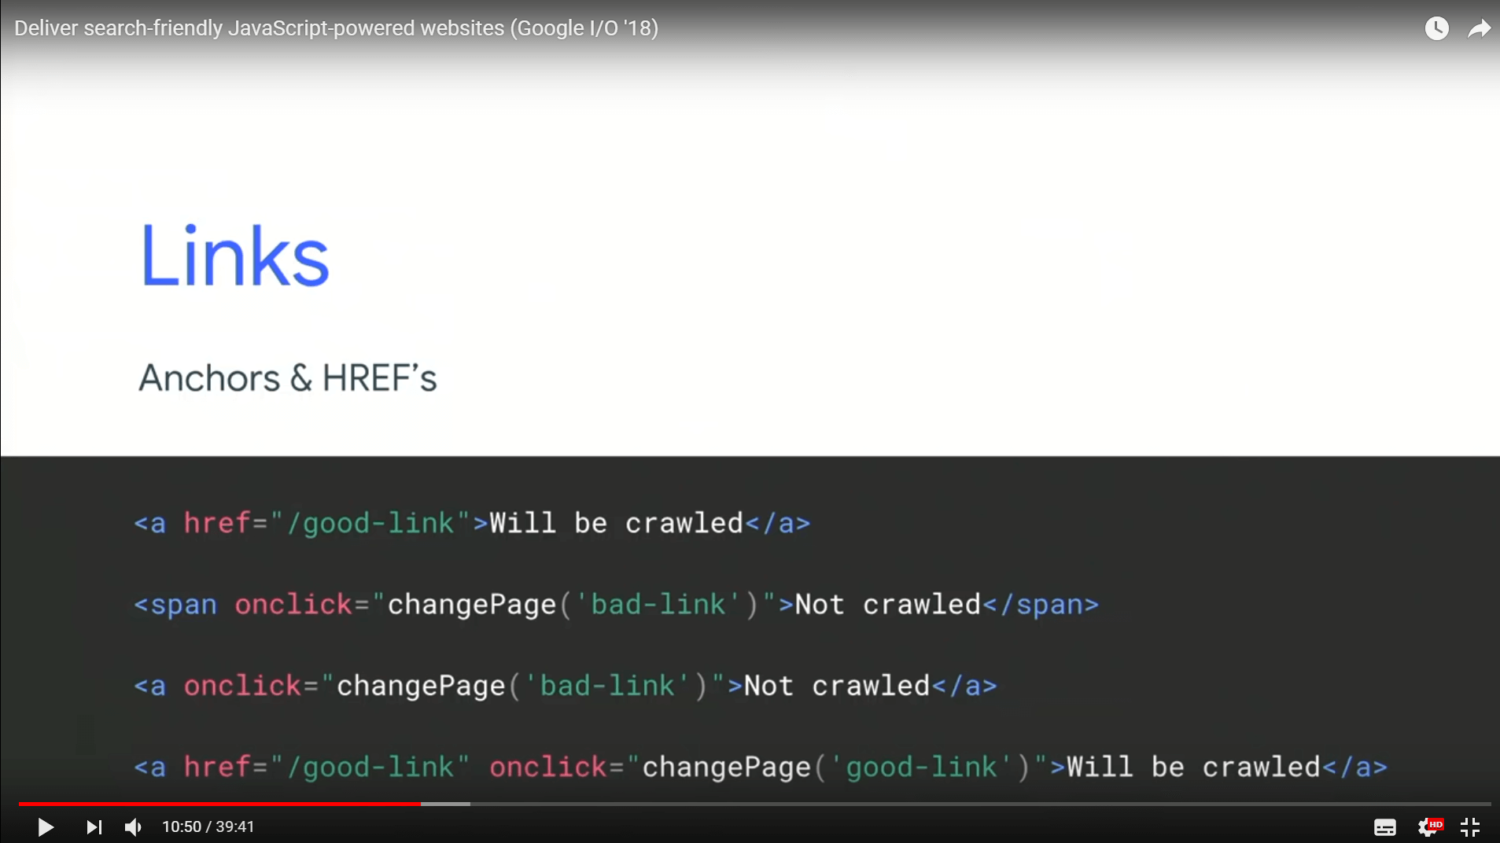
Please note: if you have proper links, with some additional parameters, like onClick, data-url, ng-href, that’s still fine for Google.
A common mistake made by developers: Googlebot can’t access the second and subsequent pages of pagination
Not letting Googlebot discover pages from the second page of pagination and beyond is a common mistake that developers make.
When you open the mobile versions for Gearbest, Aliexpress and IKEA, you will quickly notice that, in fact, they don’t let Googlebot see the pagination links, which is really weird. When Google enables mobile-first indexing for these websites, these websites will suffer.
How do you check it on your own?
If you haven’t already downloaded Chrome 41, get it from Ele.ph/chrome41.
Then navigate to any page. For the sake of the tutorial, I’m using the mobile version of AliExpress.com. For educational purposes, it’s good if you follow the same example.
Open the mobile version of the Mobile Phones category of Aliexpress.

Then, right-click on View More and select the inspect button to see how it’s implemented.

As you can see, there are no , nor links pointing to the second page of pagination.
There are over 2,000 products in the mobile phone category on Aliexpress.com. Since mobile Googlebot is able to access only 20 of them, that’s just 1 percent!
That means 99 percent of the products from that category are invisible for mobile Googlebot! That’s crazy!
These errors are caused by the wrong implementation of lazy loading. There are many other websites that make similar mistakes. You can read more in my article “Popular Websites that May Fail in Mobile First Indexing”.
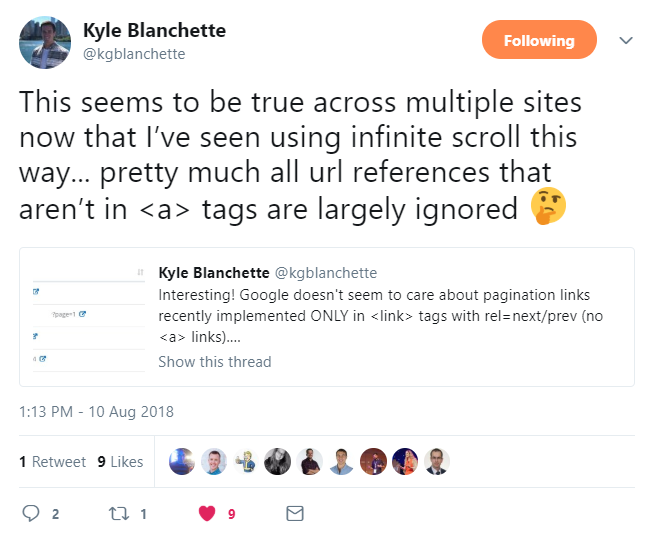
TL;DR: using link rel=”next” alone is too weak a signal for Google
Note: it’s common to use “link rel=”next’ to indicate pagination series. However, the discoveries from Kyle Blanchette seem to show that “link rel=”next” alone is too weak a signal for Google and should be strengthened by the traditional links.
John Mueller discussed this more:
“We can understand which pages belong together with rel next, rel=”previous”, but if there are no links on the page at all, then it’s really hard for us to crawl from page to page. (…) So using the rel=”next” rel=”previous” in the head of a page is a great idea to tell us how these pages are connected, but you really need to have on-page, normal HTML links.

Don’t get me wrong — there is nothing wrong with using . On the contrary, they are beneficial, but it’s good to combine these tags with traditional links.
Checking if Google can see menu links
Another important step in auditing a JavaScript website is to make sure Google can see your menu links. To check this, use Chrome 41.
For the purpose of the tutorial, we will use the case of Target.com:
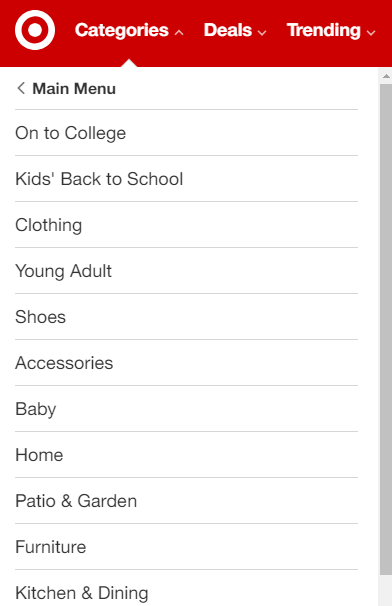
To start, open any browser and pick some links from the menu:
- https://www.target.com/c/clothing/-/N-5xtd3 -> Clothing
- https://www.target.com/c/shoes/-/N-55b0t -> Shoes
- https://www.target.com/c/furniture/-/N-5xtnr -> Furniture
Next, open Chrome 41. In the Chrome Developer Tools (click Ctrl + Shift + J), navigate to the elements tab.
The results? Fortunately enough, Google can pick up the menu links of Target.com.
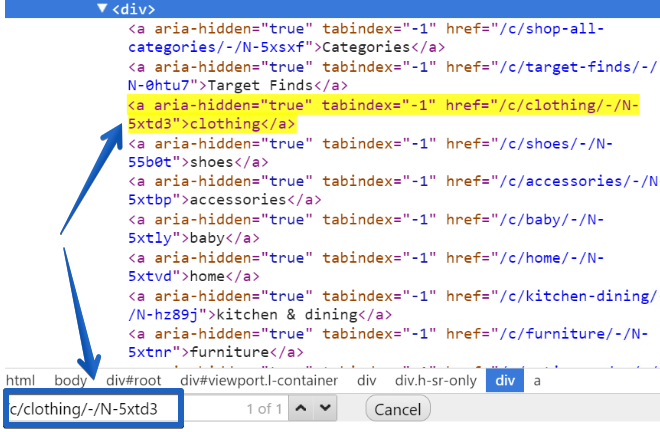
Now, check if Google can pick up the menu links on your website and see if you’re on target too.
Step 6: Checking if Google can discover content hidden under tabs
I have often observed that in the case of many e-commerce stores, Google cannot discover and index their content that is hidden under tabs (product descriptions, opinions, related products, etc). I know it’s weird, but it’s so common.
It’s a crucial part of every SEO audit to make sure Google can see content hidden under tabs.
Open Chrome 41 and navigate to any product on Boohoo.com; for instance, Muscle Fit Vest.
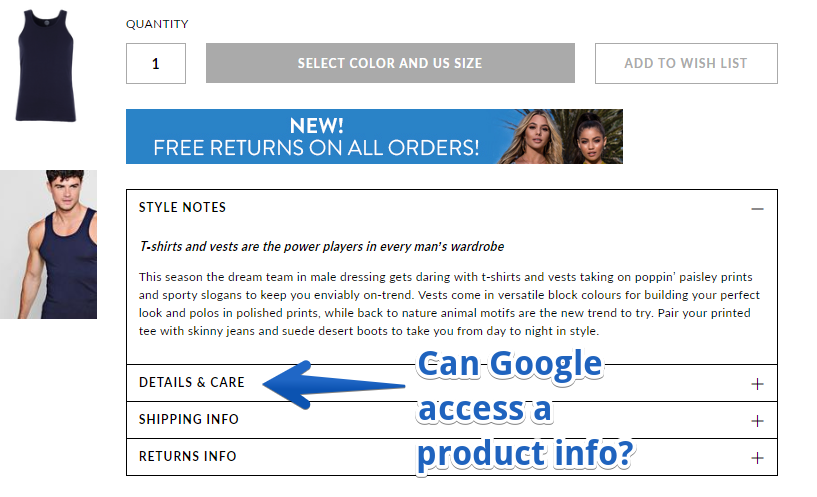
Click on Details & Care to see the product description:
“DETAILS & CARE
94% Cotton 6% Elastane. Muscle Fit Vest. Model is 6’1″ and Wears UK Size M.“
Now, it’s time to check if it’s in the DOM. To do so, go to Chrome Developers Tools (Ctrl + Shift + J) and click on the Network tab.
Make sure the disable cache option is enabled.

Click F5 to refresh the page. Once refreshed, navigate to the Elements tab and search for a product description:
“>
As you can see, in the case of boohoo.com, Google is able to see the product description.
Perfect! Now take the time and check if your website is fine.
Wrapping up
Obviously, JavaScript SEO is a pretty complex subject, but I hope this tutorial was helpful.
If you are still struggling with Google ranking, you might want to think about implementing dynamic rendering or hybrid rendering. And, of course, feel free to reach out to me on Twitter about this or other SEO needs.
Sign up for The Moz Top 10, a semimonthly mailer updating you on the top ten hottest pieces of SEO news, tips, and rad links uncovered by the Moz team. Think of it as your exclusive digest of stuff you don’t have time to hunt down but want to read!
![]()